
When I first unboxed my Keurig, I felt a mix of excitement and confusion.
But here’s a kicker:
I’ve spent years getting up close and personal with every model of Keurig you can imagine. I’ve learned their quirks, their beeps, and their blinks.
Ready for the inside scoop? Join me as we go over how to use the Keurig coffee maker.
Table of Contents
Keurig Coffee Maker Components

Before we explore how to use your Keurig, let’s look at some key components that make them so efficient.
- Water reservoir: This container supplies the machine with water and is designed to hold enough water for several cups of coffee. It is usually removable, making it easier to clean and refill.
- Drip tray: The drip tray catches any excess liquid that may overflow during the brewing process. It is located at the bottom of the Keurig machine and is removable for easy cleaning.
- K-Cup pod holder: This component ensures the pod is properly positioned. It also houses the needles which puncture the K-Cup once the machine is closed.
- Control Panel & Display: The user-friendly interface lets you operate your Keurig to select your desired brewing options, including the brew sizes and strength.
- Milk Frother: Some Keurig models, like the Keurig K Cafe, have side-mounted milk frothers for making lattes and cappuccinos. This frother supports frothing warm and cold milk.
Step-by-Step Guide to Using Your Keurig Coffee Machine
Now that you’re familiar with the major components of your Keurig, it’s time to start brewing. I will be using the Keurig K-Cafe coffee maker for this tutorial.
So, grab your Keurig machine with your favorite K-Cup and follow these steps…
Step 1: Fill the Water Reservoir with Clean Water
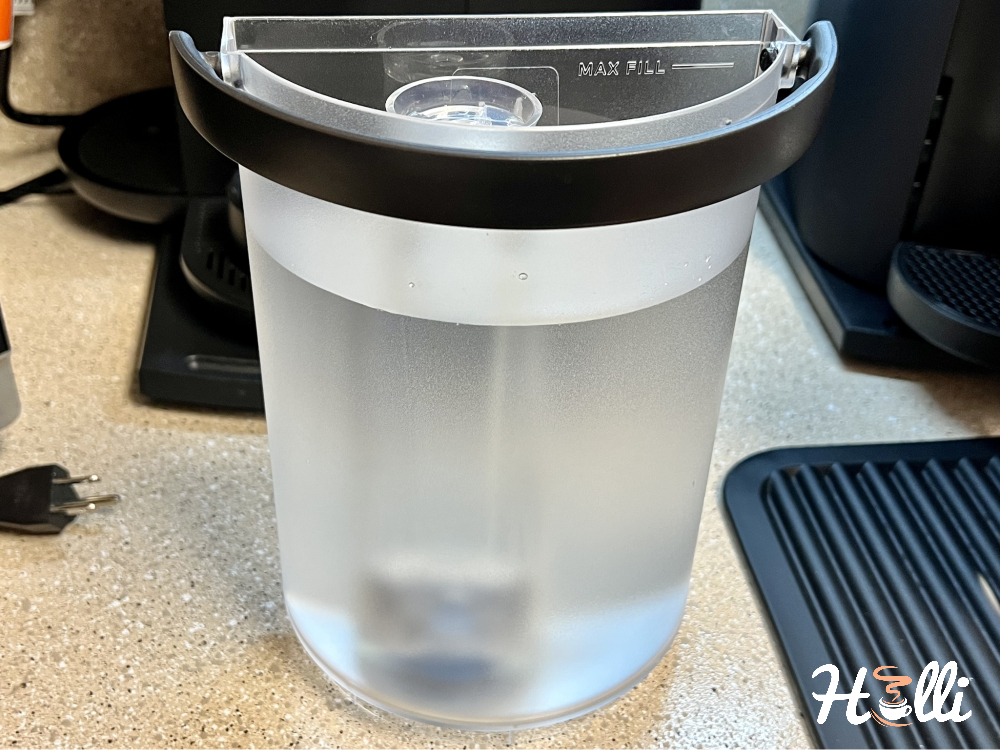
To begin, locate the water reservoir and fill it to the maximum fill line with purified water. Try not to overfill your water tank to avoid spillage.
Then, reinsert the water reservoir into its original position. If your Keurig has other components, such as a milk frother, place them where they belong.
It would be best to refer to your Keurig machine’s manual for precise instructions.
Step 2: Power On Your Keurig Machine

As with any electrically powered appliance, you must ensure your Keurig coffee maker is properly connected to a power source.
When you do this for the first time, you will hear a click on the inside—the internal computer turning on.
Then, push the power button to turn it on.
Step 3: Insert Your K-Cup Into the K-Cup Pod Holder
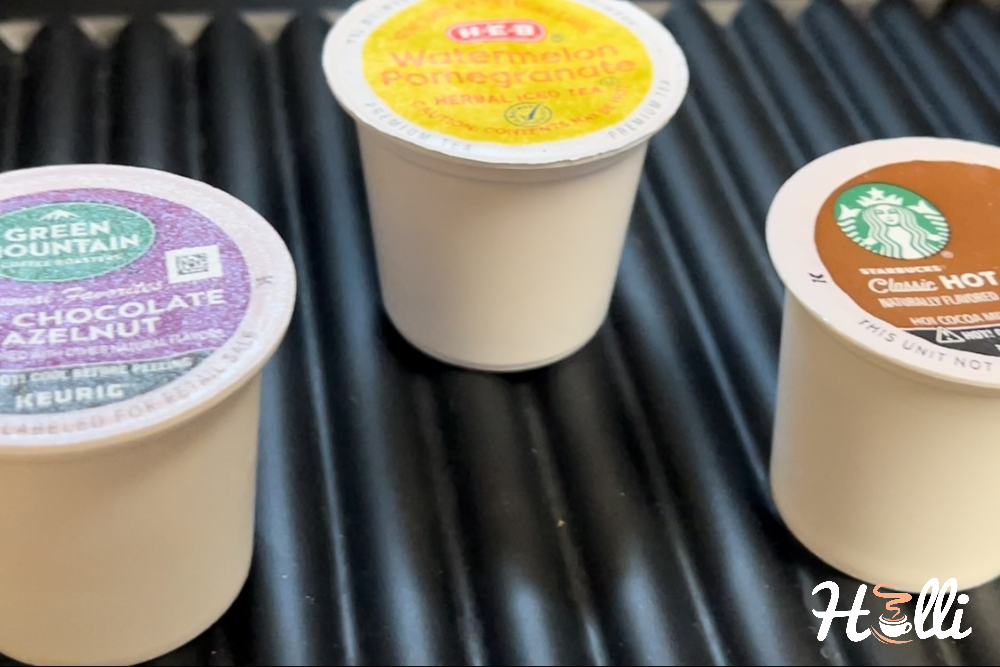
Now comes the secret ingredient—your K-Cup.
There are countless K-Cup flavors to choose from, ranging from flavored coffee and tea to hot chocolate and chai lattes.
For this demonstration, I will use a flavored tea K-cup (watermelon pomegranate.)
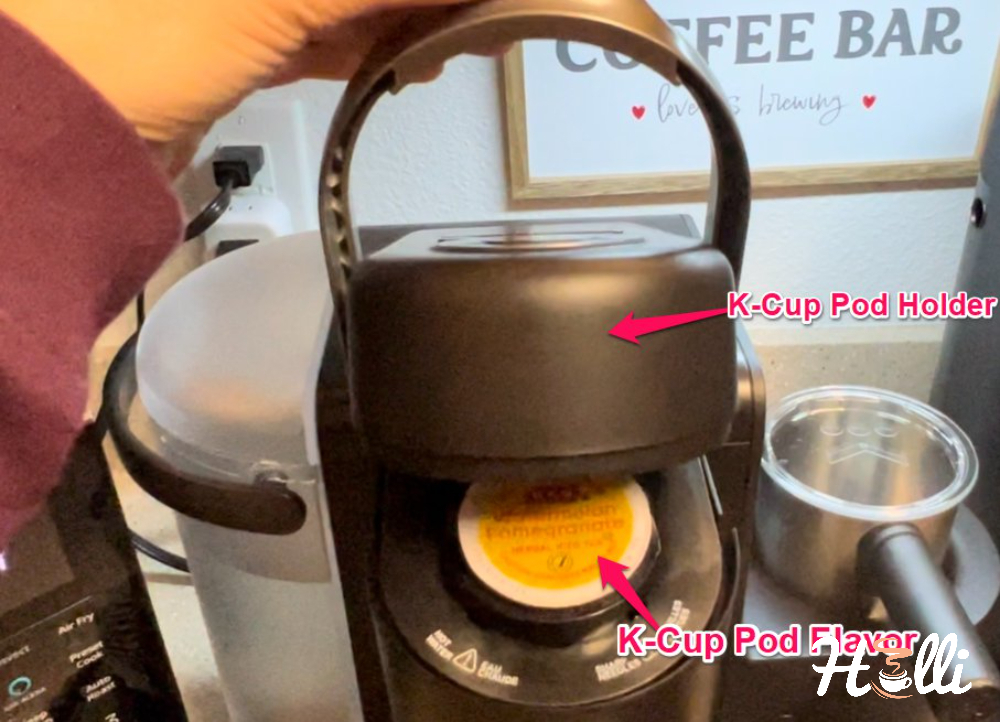
To begin, gently place the K-Cup into the K-Cup holder. Be sure to keep the labeled side of the K-Cup facing up.
After inserting the K-Cup pod, grab the handle of the K-Cup holder and press it down.
You’ll hear a “click” indicating that the K-Cup was punctured with the needles at the top and bottom of the K-Cup holder.
At this point, your machine is ready for brewing.
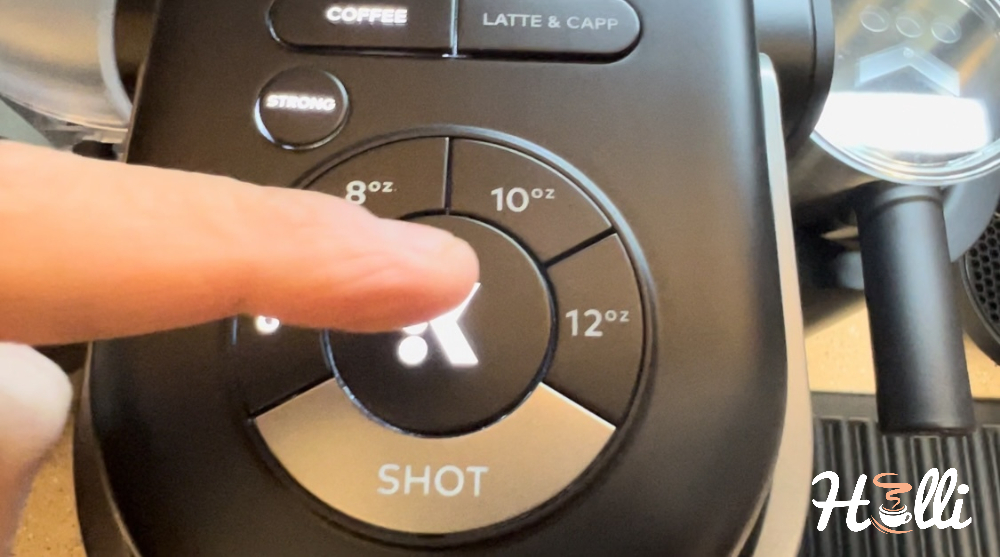
Step 4: Select Your Desired Cup Size and Strength
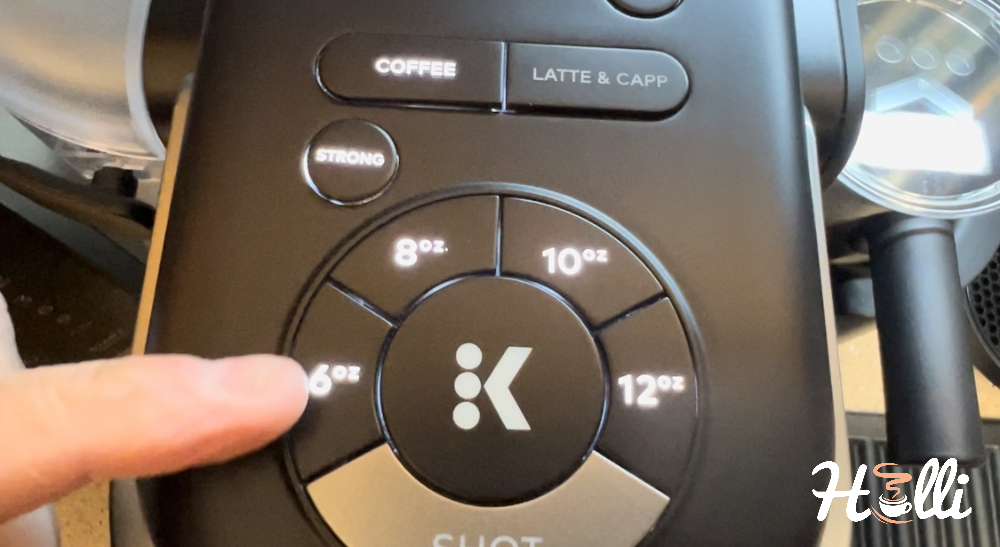
Whether you’re making iced tea, coffee, or hot chocolate, press the “COFFEE” button to begin the brew.
If your Keurig has a “STRONG” option, click on it for a slightly more concentrated flavor.
Speaking of flavor, selecting the smallest brew size is advisable to get the richest flavor. As such, I will select the 6 oz option.
Step 5: Press the “K” Button to Start Brewing
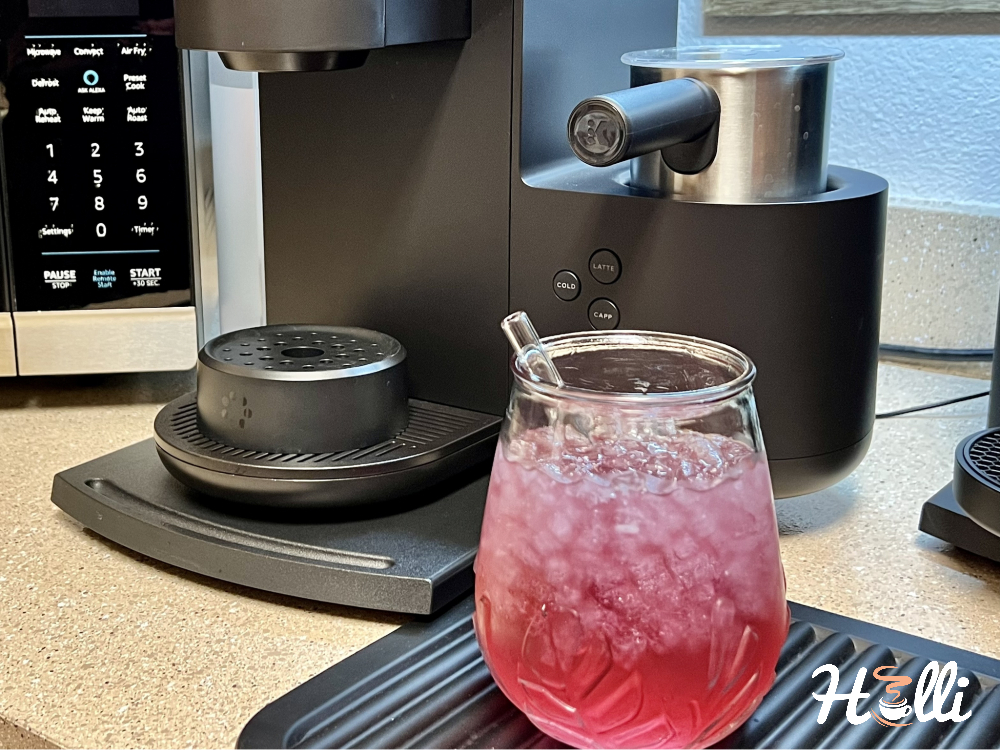
Before you begin brewing your coffee, place a cup or mug on the drip tray. This glass or mug should be sufficient-sized to contain the selected brew size.
If you prefer a cold brew, add some ice to your cup. However, when preparing a hot beverage, ensure the glass is heat resistant.
Because I’m making an iced tea, my glass is ice-filled and sitting on the drip tray.
All set?
Press the “K” button at the center of the control panel to begin the brew. Once your machine starts brewing, completing the process only takes a few minutes.
Step 6: Power Off Your Keurig
When the brew is over, remove the empty disposable K-Cup from the pod holder and throw it away. You should give your Keurig a few minutes to cool down before doing this to avoid burning yourself.
Of course, if you’re using a refillable K-Cup, you shouldn’t throw it away.
Finally, turn off your machine by pushing the power button and unplugging it from the outlet.
I only made one cup of my iced drink, but you can make several cups depending on your K-Cup size.
Happy sipping!
Coffee Holli’s Tips for Maximizing Your Keurig Coffee Machine
- To keep your machine running optimally, remove the brew basket and rinse it thoroughly after each use. Don’t forget to replace the basket before brewing the next cup.
- Maintenance is key! Regularly clean and descale your Keurig, making sure to replace the water filter. I typically perform a descaling procedure every six months.
- Your Keurig coffee machine can make more than just hot coffee. You can brew hot or iced teas, lattes, and chocolate drinks.
- Additionally, you can use the hot water feature to prepare soups, instant oatmeal, and even steep tea.
- Branded specific guide: Keurig Mini