
Picture this:
It’s early morning, you’re craving that perfect cup of coffee, but what you get tastes… off. Over the years, as a passionate coffee lover, I’ve realized the culprit is often a scaled-up Keurig.
You see, an immaculate machine equals an immaculate brew.
Descaling? It’s not just a fancy term. It’s a necessity if you want to savor every sip. In this guide, I’m sharing my tried-and-true method of using vinegar to combat that pesky limescale.
So, let’s turn that average cup of Joe into something exceptional. Dive in with me.
Table of Contents
What You’ll Need
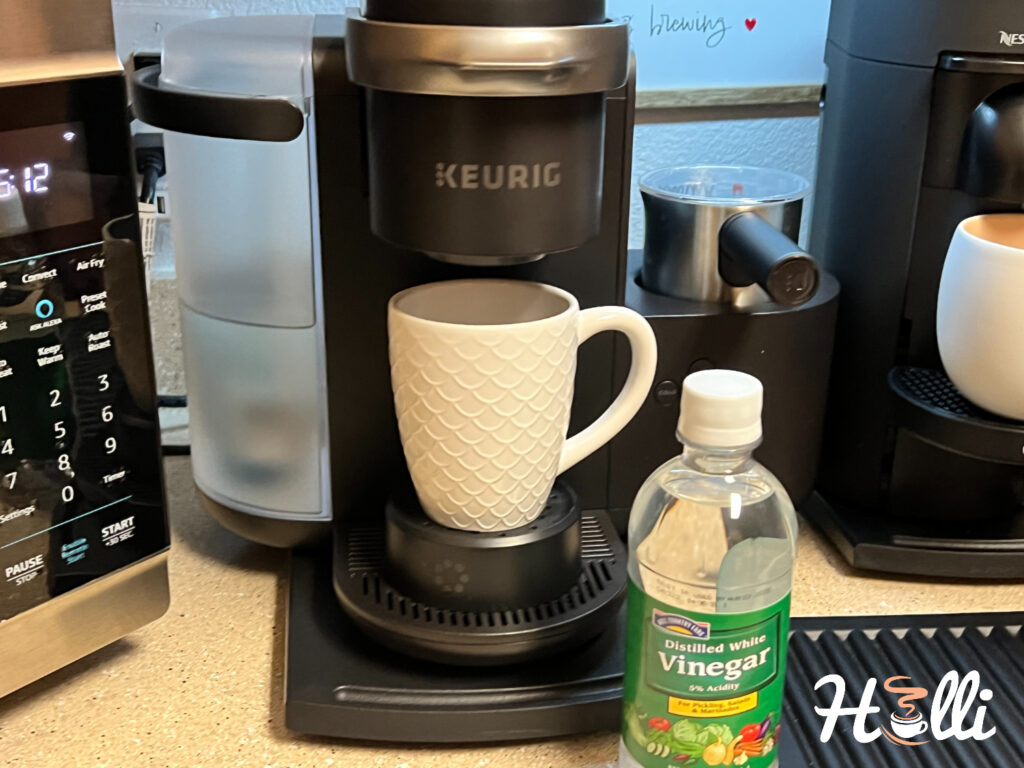
- Clean water.
- Undiluted white vinegar (typically composed of 95% water and 5% acetic acid).
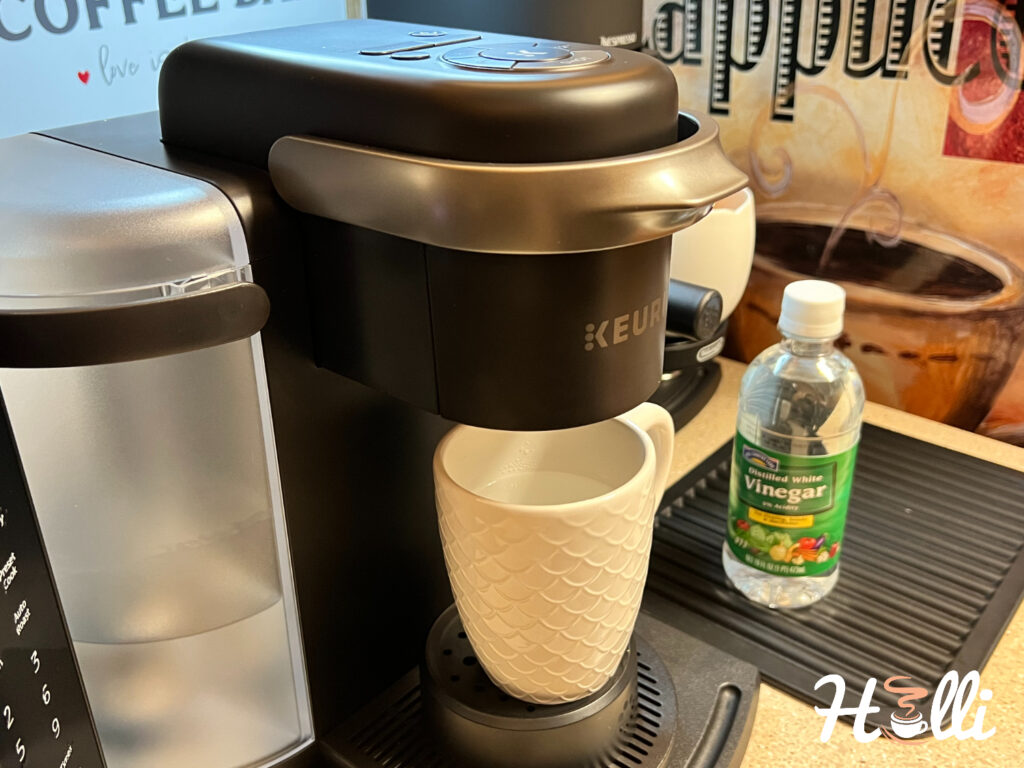
- A large ceramic mug or heat-proof glass.
- A sink or basin (You’ll be pouring out a few rounds of liquids, so keep it close!)
Step-by-Step Guide
Step 1: Power Up

Ensure your Keurig is plugged in and powered up, ready for the descaling process.
Step 2: Remove the Water Filter (IMPORTANT)
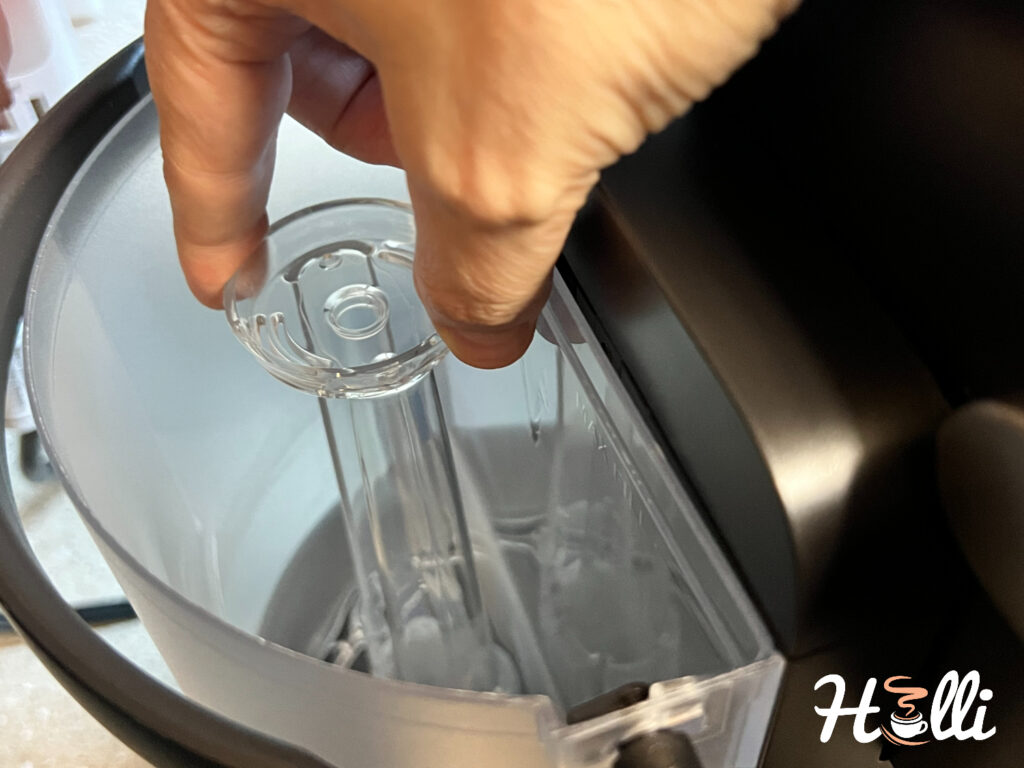
Now, here’s something crucial – the water filter. It’s a champ for daily brews but for descaling? It needs a time-out.
By the way, not every Keurig is blessed with one. For instance, my trusty K-Cafe has one. Here’s a quick list of some other models with water filters:
- K-Cafe (yep, my go-to!)
- K-Classic
- K-Café Special Edition
- K-Latte
- K-Elite
- K-Compact
- K-Select
To tackle this step, pull out the filter handle with a gentle touch. After that, pop off the top cover to greet the filter cartridge.
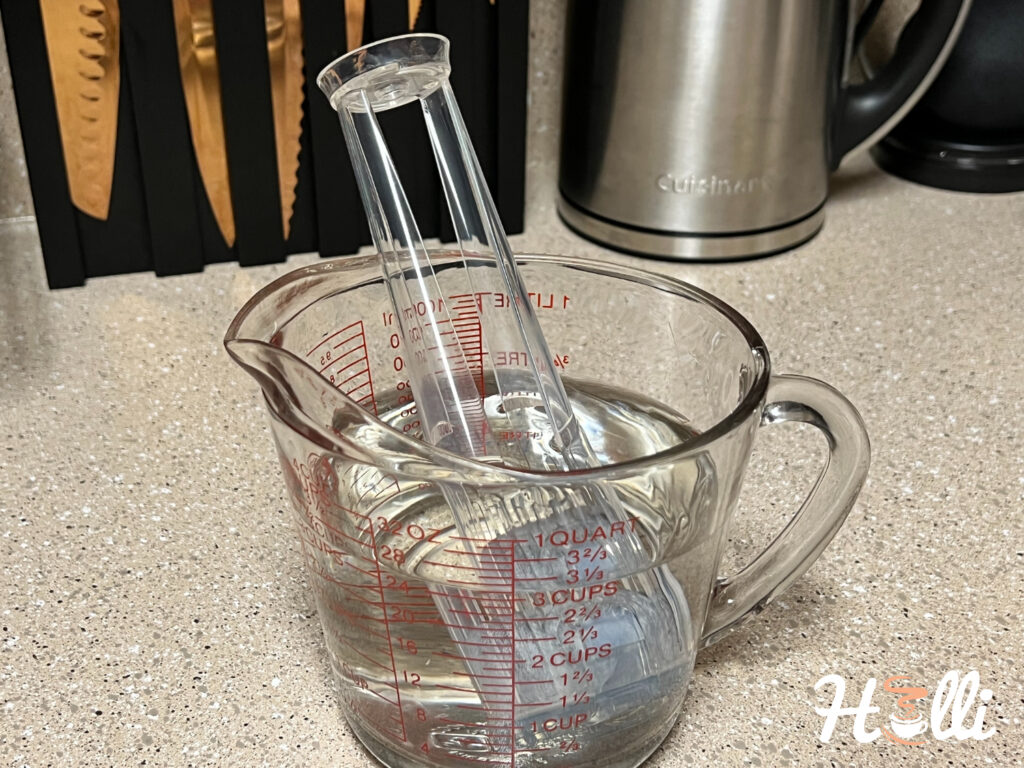
Next, give that cartridge a good rinse under tap water. Pro tip: while you’re at it, let the handle have a little soak in a bowl of water.
Step 3: Prepare the Descaling Solution
Here’s a thing I learned after countless Keurig clean-ups:
The magic lies in the descaling solution.
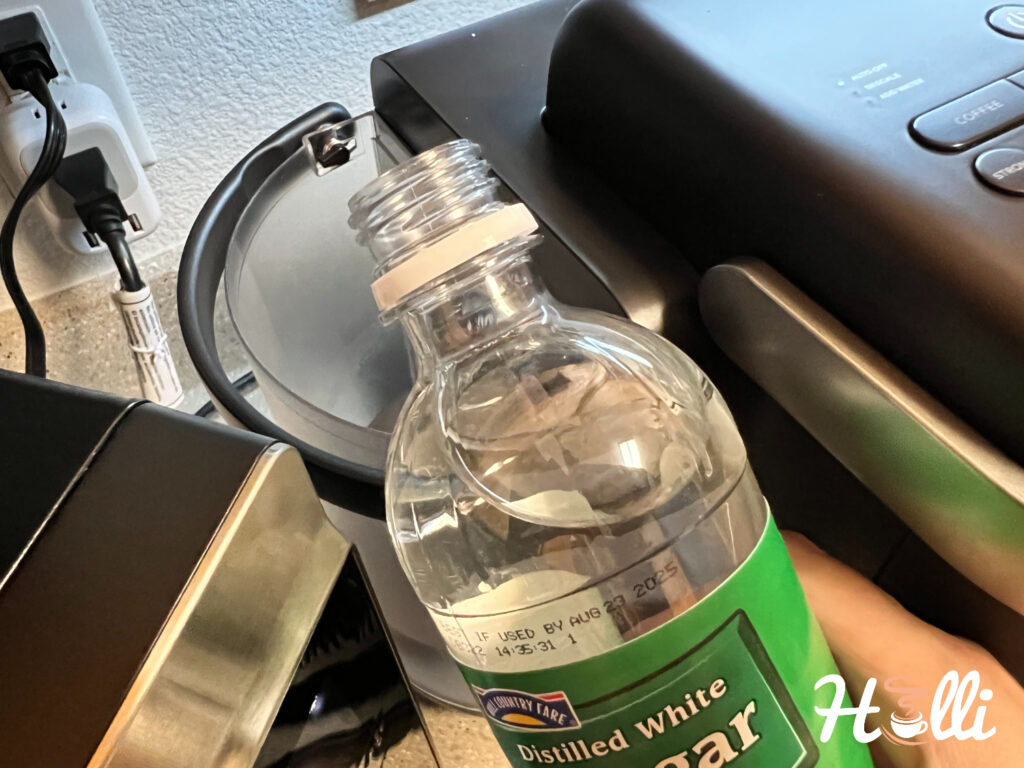
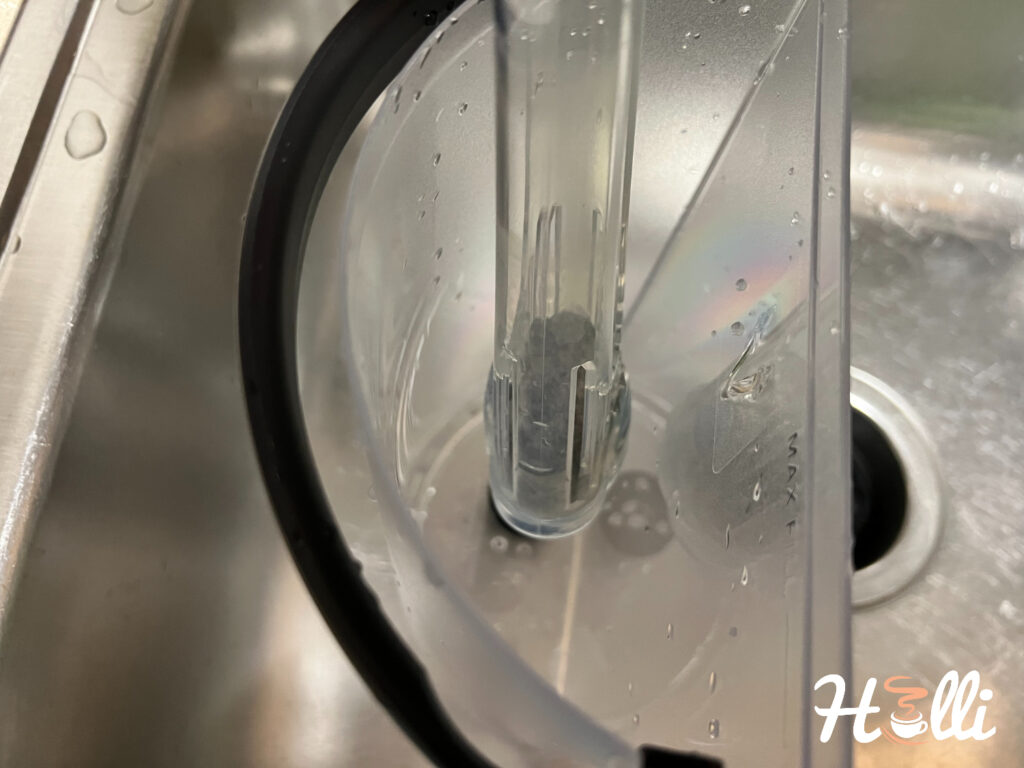
First things first. Remove that water reservoir and pour out any leftover water. You want it empty and ready.
Then, fill it with a cup of white vinegar. Add the same amount of clean water. Simple math, that’s a 50/50 mix.
Why this mix?
Well, it effectively tackles limescale while being gentle on your machine.
A little insight:
White vinegar is mainly water (about 95%) with the rest being acetic acid (5%). Sure, you could use it straight up, but brace yourself for longer rinsing later. Personally, I pull out the undiluted vinegar only for those hardcore descaling sessions.
Once you’ve got your solution mixed, pop that reservoir back and lock it in.
And here’s a golden tip:
Always flip through your Keurig’s user guide. Different models might have different dos and don’ts. I’ve seen models that suggest a whopping 48 oz of pure white vinegar. Always double-check!
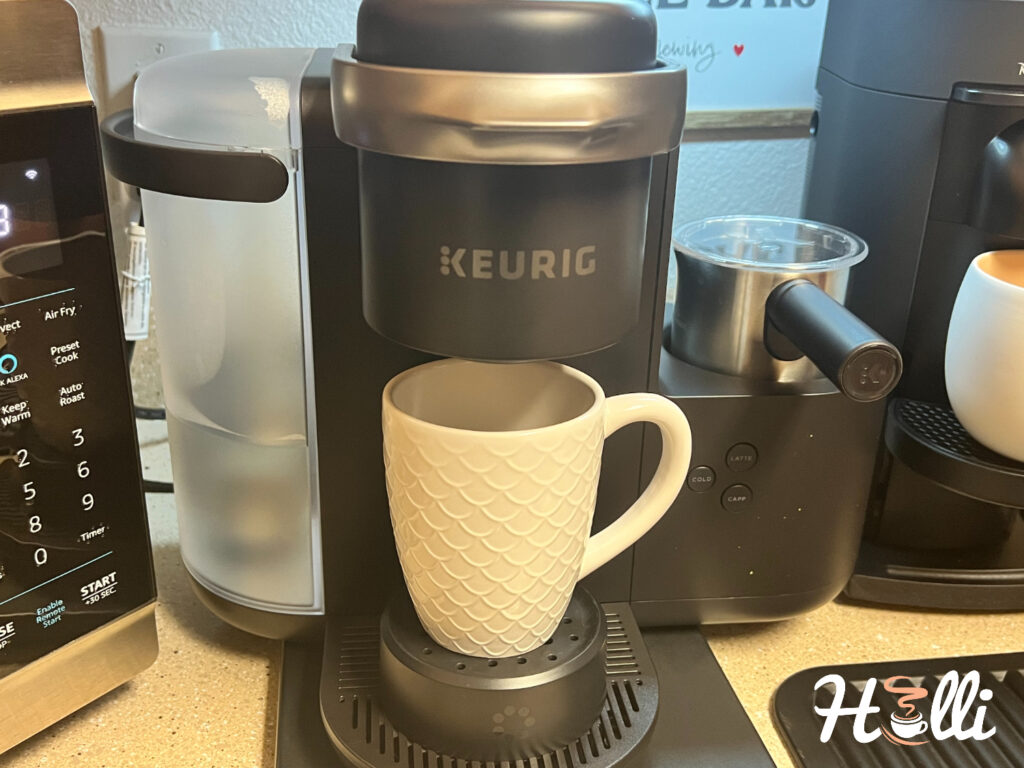
Step 4: Place a Mug or Glass Under the Outlet
When I first started descaling coffee machines, I underestimated the amount of solution these machines churn out. My kitchen counter? It became a miniature lake.
The lesson?
Descaling isn’t just about the solution working its magic inside. It’s also about what comes out.
Here’s the scoop:
Your Keurig will suck in the descaling solution, give it a little internal tour through its brewing chamber, and then spit it out, piping hot.
So, don’t risk a mess. Place a robust mug or glass – preferably one with a handle – right under that outlet. And paper cups? They’re a no-go because of the scalding solution.
But, heads up:
You’ll be playing a game of ’empty and refill’ with that mug. Not just during the descaling, but the rinsing that follows too.
Oh, and a pro tip?
Make sure your Keurig is K-cup free when you’re descaling.
However, and this is key:
Certain Keurig models, like the Keurig Vue V1255 Brewer, play by their own rules. These guys need an empty K-cup to jumpstart the brewing cycle. Always good to check your model specifics!
Step 5: Enter the Descaling Mode
You’ve prepped your Keurig and your descaling mix is waiting. Now, it’s time to enter the descaling mode.
Here’s the thing:
Every Keurig isn’t made equal. Take my K-Cafe Coffee, Latte, and Cappuccino Maker, for instance. It doesn’t have a separate “descaling mode.” So, for machines like mine, it’s business as usual – almost like you’re brewing your morning coffee.
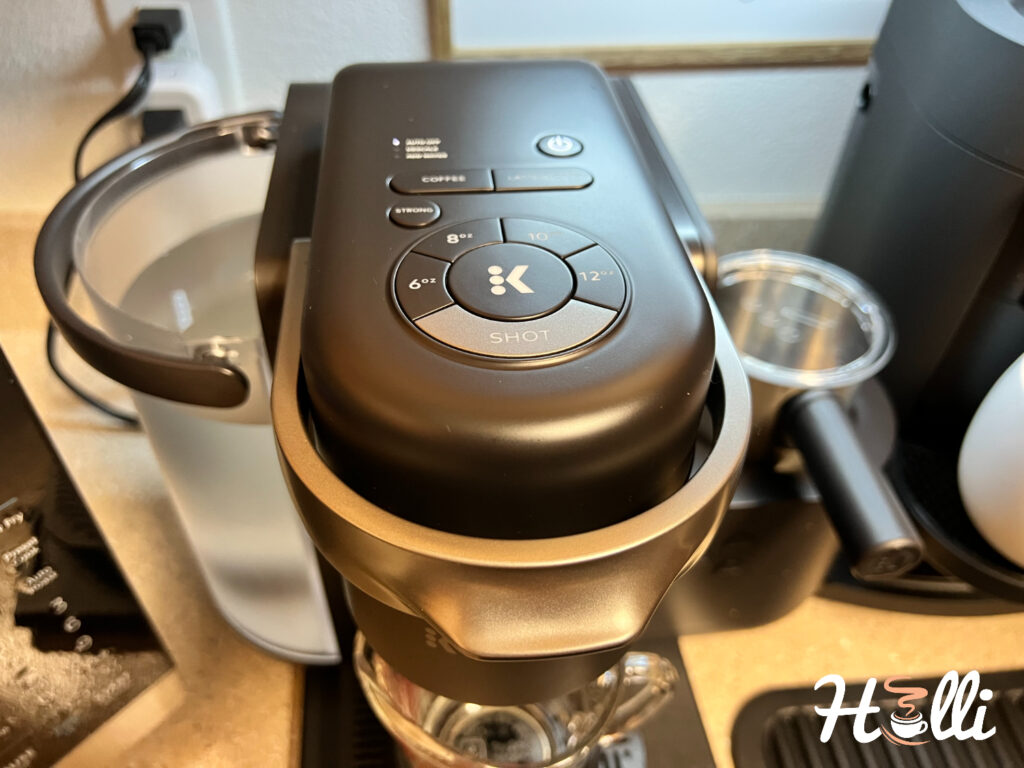
What I do? Lift the lid, choose the coffee setting, hit the largest cup size, and press that ‘K’ button.
Models that walk and talk like my K-Cafe? Here’s a quick list:
- K-Mini
- K-Mini Plus
- K-Classic
- K-Café Special Edition
- K-Latte, K-Elite
- K-Compact
- K-Select
- MINI Plus B31
Now, if you’re using a Keurig with a special descaling feature, here’s the game plan:
Turn off the Keurig. Hold the 8 and 12-ounce buttons together for 3 seconds. Once the descale and ‘K’ buttons light up, you’re golden.
Models in this category? Here are some:
- K-Supreme
- K-Supreme Plus
- K-Slim
- K-Slim + Iced
- K-Iced Plus
- K-Express
- K-Iced Brewers
Own a K-Express Essentials or K-Iced Essential brewer? Just press the 6oz and 10oz buttons together for 3 seconds. You’re in!
A heads-up:
Machine specifics can be quirky. My advice? Your user manual is your best friend. Always have a peek.
Step 6: Run the First Descaling Round
Entering descaling mode feels like a victory, but the real magic begins with the first descaling cycle.
Confession time:
I have a k-café model without a specific descaling mode. Relatable? Just follow along. First, simply open and close the lid. Next, tap the ‘coffee’ button and, like me, go big – choose the largest cup size. For my trusty machine, that’s the 12 oz setting.
Hit the K-cup button. You’ll notice your machine springing to life, drawing the descaling solution, guiding it through the intricate maze of heating elements and tubes inside. Finally, like a proud coffee brew, it’ll pour out into your mug.
But if your machine boasts a dedicated descaling mode, you’re in luck! Just trigger it, set your brew size, and punch that K button.
Finished? Great. Now, pour the steaming solution down the sink. Let’s move on.
Step 7: Let the Machine Rest For 20-40 Minutes
Here’s a trick I’ve used countless times:
Once the mug is right back where it belongs, kick off another brew cycle.
But here’s the catch:
As soon as it gets going, power the brewer down. You’re reading that right. This little interruption ensures the vinegar solution fully infiltrates the machine’s inner workings.
Now, the waiting game:
Give your machine a breather, letting it sit for about 20 to 40 minutes. Think of this as the brewer taking a vinegar bath. And just like a bath, the longer you soak, the more rejuvenating it is.
A little heads up:
Certain Keurig models, like the Elite B4, Classic B44, Special Edition B60, and Platinum B70, are a bit high maintenance. They prefer a more extended pampering session, soaking for a solid 4 hours.
And one last thing:
If your Keurig has an auto-shutoff feature, make sure to disable it. We don’t want it nodding off in the middle of its spa treatment.
Step 8: Repeat Until the Vinegar and Water Solution Run Out
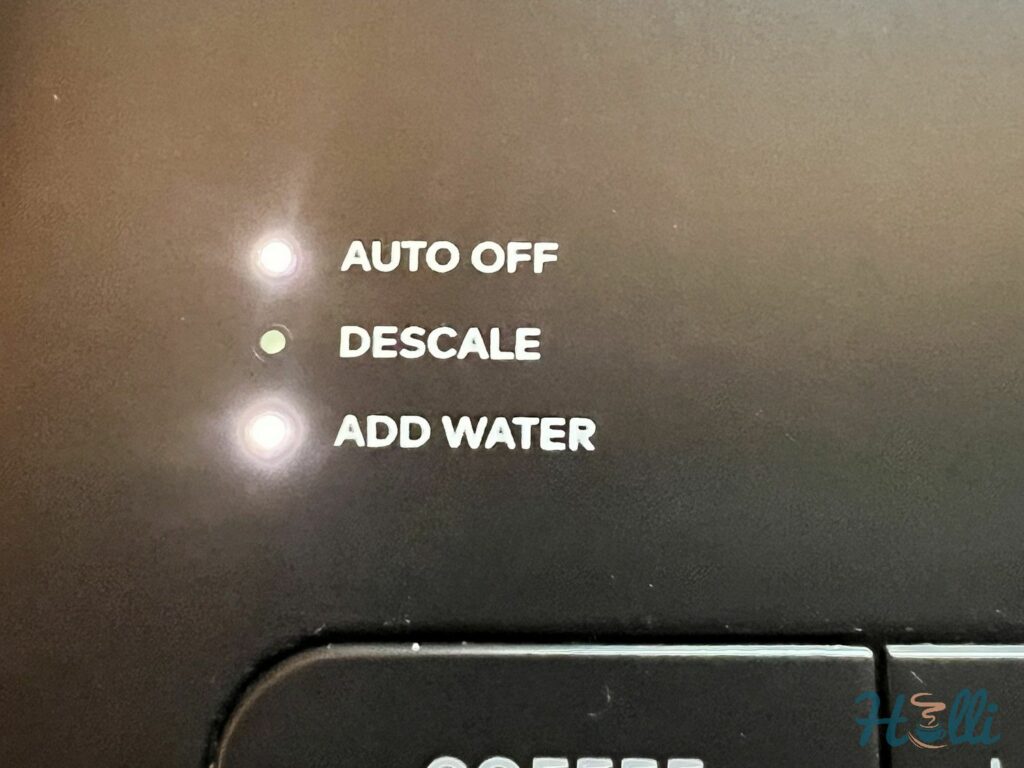
After the 20-40 minutes rest, continue the brewing process until the “add more water” alert appears. At this point, don’t add more water. Instead, discard any residual vinegar solution and get into rinsing.
Step 9: Run Multiple Rinse Cycles
Let me share a personal tip:
Never underestimate the power of a thorough rinse, especially after descaling.
First up:
Make sure to give that water reservoir a good scrub to say goodbye to any lingering vinegar traces. Trust me, you don’t want a vinegary coffee. Use warm, soapy water and rinse until you’re sure there’s no soap left.
Done?
Fill that reservoir up with cold, fresh water and pop it back in its rightful place on the machine.
Now, here’s the part that needs a tad bit of patience:
Kick off several brewing cycles, using just water. Think of it as a spa detox for your Keurig, flushing out every last drop of vinegar. And remember, always empty your mug between each cycle.
Quick tip based on my Keurig know-how:
Most models give a “descaling” alert which, if everything goes as planned, should vanish when you’re done. If it’s playing hard to get, a quick glance at your manual will guide you on shutting it off.
Lastly, and this one’s my grandma’s secret test:
Brew some water into a glass and sprinkle a wee bit of baking soda. Witness any fizz? That’s a sneaky sign of vinegar still in the system. Keep the rinse cycles going until your water-baking soda combo stays calm and fizz-free.
Step 10: Post-Descaling Cleaning
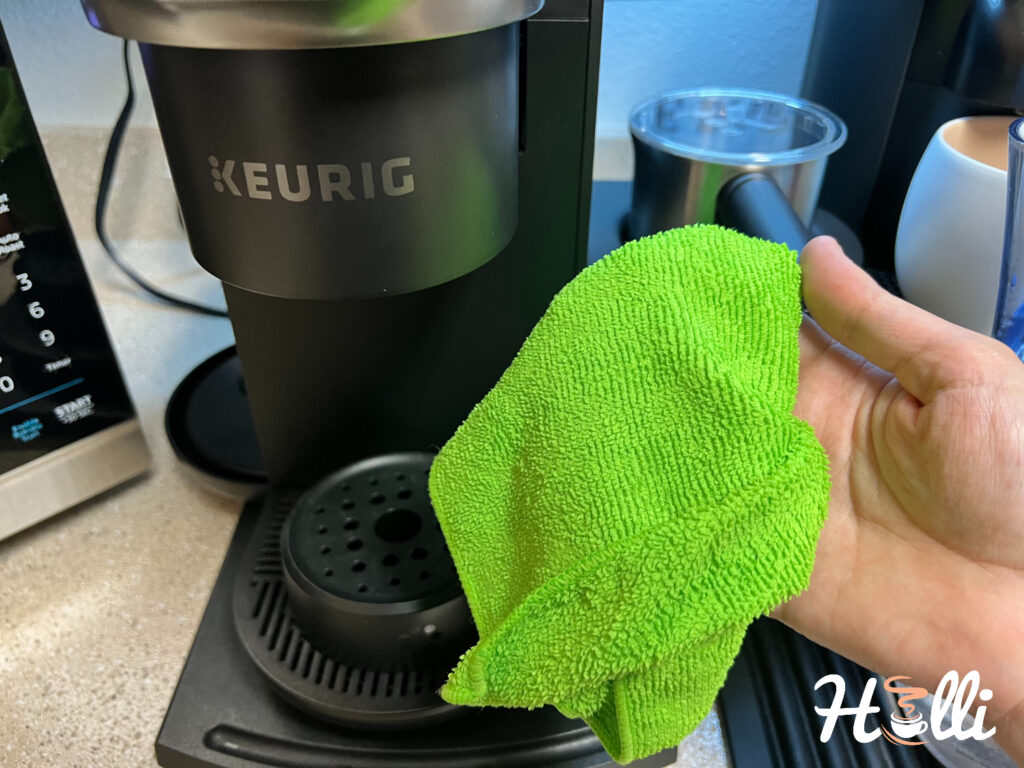
Here’s a lesson I’ve learned over countless cups of coffee:
A sparkling Keurig doesn’t just brew better—it looks better too.
Let’s kick things off by pulling apart what can be pulled apart. That means the drip tray, K-cup holder, and any other detachable bits. Give them a good wash.
Then there’s the needle. It’s tiny but crucial. Ensure it’s spotless and devoid of any blockages.
Now for the final touch:
Grab a damp cloth and give the machine’s exterior a thorough wipe down. You’d be surprised at how much dust and coffee dribbles it can accumulate. Oh, and don’t forget the base—it’s a sneaky spot where water tends to linger post-descaling.
Phew! All done.
Now step back and admire your work. Your Keurig should shine like it’s straight out of the box.
Pro tip: Get into the routine of descaling every 3 to 6 months, or whenever your Keurig gives you the nudge with its descale alert.
And trust your taste buds – if the coffee starts tasting a bit off, or if your Keurig seems to be slacking on the heat, it might be time for another round.
Do you have a burning question or just want to chat about coffee? Drop it in the comments below. I’m all ears!
Great video. Didn’t know how to do this
Thanks Christine!